React JS Cheat Sheet
Last updated 29th.April.2025
Want to know about React JS Cheat Sheet. Then you are at the right place, this article will guide you through it.

About The Author
Sai Ram Soma Having 12+ years of IT experience in React JS & Native, JavaScript, Typescript. Working in a startup from day one. Accustomed to learning and keeping up with the current trend. Experience in developing feature rich web applications using React JS. Experience in developing mobile applications in Android, React Native.

Contents


What is React JS Cheat Sheet?
In the fast-paced world of web development, it can be hard to keep up with all the frameworks, libraries, syntax, and best practices.
That’s where cheat sheets come in handy. Think of a cheat sheet as your handy reference guide, a compact yet comprehensive resource that provides key information at a glance.
Whether you’re a beginner trying to grasp the basics or a seasoned developer looking to recall complex syntax quickly, cheat sheets save time and boost productivity.
This guide offers detailed cheat sheets for some of the most popular tools and technologies today in web development React JS, Node JS, Angular, and JavaScript.
From setting up your development environment to understanding core concepts and writing clean code, each section is designed to help you navigate the development process more efficiently.
Cheat sheets are handy because:
- They serve as quick reminders without the need to search through lengthy documentation.
- They help in interview preparation by summarizing key topics.
- They are perfect for revising concepts and improving coding speed during real-time projects.
What is React and it's Features ?
React is one of the most popular JavaScript libraries used for building user interfaces, especially single-page applications where performance and speed are critical. Developed and maintained by Facebook (now Meta), React has gained immense popularity among developers due to its component-based architecture, efficient rendering, and seamless user experience.
React was first released in 2013 and has since become a vital part of the modern web development ecosystem. It allows developers to build large-scale applications that can update and render efficiently in response to data changes. What makes React unique is its declarative approach and ability to create reusable components, which makes the development process faster, more predictable, and easier to debug.
Why use React ?
Before diving into React’s features, it’s important to understand why developers choose it over other front-end frameworks:
- Component-Based Architecture: You can break down a UI into independent, reusable components. Each component manages its own state and logic, which promotes better code organization and reusability.
- Declarative Programming: React makes it painless to create interactive UIs. You simply design views for each state in your application, and React updates and renders the right components when your data changes.
- Virtual DOM: React uses a virtual representation of the DOM to minimize costly DOM manipulations. When changes are made, React calculates the most efficient way to update the browser’s DOM, resulting in improved performance.
- Unidirectional Data Flow: React enforces a one-way data flow, which makes it easier to debug and understand how data changes in your application.
- Strong Ecosystem: With a massive community and thousands of third-party libraries, React integrates well with various tools like Redux, React Router, and Material-UI.
- Cross-Platform Capabilities: With tools like React Native, developers can build mobile applications using the same React concepts and even share some code across platforms.
Key Features of React
- JSX (JavaScript XML):
JSX is a syntax extension for JavaScript that looks similar to HTML. It allows developers to write UI components with a syntax that closely resembles HTML while still leveraging the power of JavaScript.
jsxCopyEditconst element = <h1>Hello, world!</h1>;
2. Components and Props:
Components are the building blocks of a React application. Props (short for properties) are used to pass data from one component to another.
jsxCopyEditfunction Welcome(props)
{
return <h1>Hello, {props.name}</h1>;
}
3. State Management:
React allows components to manage their own local state. The useState hook, introduced in React 16.8, is a powerful feature for handling state in functional components.
jsxCopyEditconst [count, setCount] = useState(0);
4. Lifecycle Methods / Hooks:
React provides lifecycle methods (in class components) and hooks (in functional components) to run code at specific points in a component’s life.
- Class-based example: componentDidMount()
- Functional component example: useEffect()
5. React Router:
React Router is a standard library for routing in React. It enables navigation among different views of various components in a React Application, and allows browser URL changes to be reflected in the app’s view.
6. React Developer Tools:
React offers powerful debugging tools like the React Developer Tools browser extension, which helps inspect components, state, and props in real-time.
Real-World Use Cases of React
React is used by some of the biggest companies in the world, including:
- Facebook – The original creator of React, uses it extensively across its platform.
- Instagram – Fully built with React.
- Netflix – Uses React on its platform for rendering high-performance, dynamic UIs.
- Airbnb, Uber, and WhatsApp – All use React in their web applications for fast and responsive interfaces.
or want to continue reading about React JS Cheat Sheet
React JS Cheat Sheet

React is built around a few key principles: components, JSX, state, props, hooks, and lifecycle methods. The cheat sheet below is designed to give you at-a-glance reminders of how to work with each of these elements effectively.
JSX – JavaScript Syntax Extension
JSX allows you to write HTML-like syntax within JavaScript code. Under the hood, JSX is transpiled into React.createElement() calls.
const element = <h1>Hello, world!</h1>;
- JSX must return a single parent element.
- Use className instead of class.
- Use {} to embed JavaScript expressions inside JSX.
Functional Component:
React encourages writing functional components using modern hooks.
function Greeting(props) {
return <h1>Hello, {props.name}!</h1>;
}
or using arrow functions
const Greeting = ({ name }) => <h1>Hello, {name}!</h1>;
Props – Passing Data
Props are read-only and passed from parent to child components.
function Welcome(props) {
return <h1>Welcome, {props.user}</h1>;
}
// Usage
<Welcome user=”John” />
useState Hook – Managing State
useState is a React hook that lets you add state to functional components.
import { useState } from ‘react’;
function Counter() {
const [count, setCount] = useState(0);
return (
<div>
<p>Count: {count}</p>
<button onClick={() => setCount(count + 1)}>Increment</button>
</div>
);
}
useEffect Hook – Side Effects
useEffect runs after the component renders. It’s used for data fetching, subscriptions, timers, etc.
useEffect(() => {
console.log(“Component mounted or updated”);
}, []); // Empty array means run once on mount
Conditional Rendering
{isLoggedIn ? <Dashboard /> : <Login />}
Or using &&:
{isLoggedIn && <Dashboard />}
Lists and Keys
const items = [‘React’, ‘Node’, ‘Angular’];
<ul>
{items.map((item, index) => (
<li key={index}>{item}</li>
))}
</ul>
Keys help React identify which items have changed, added, or removed.
Event Handling
<button onClick={handleClick}>Click Me</button>
function handleClick() {
alert(‘Button clicked!’);
}
Form Handling
function FormExample() {
const [value, setValue] = useState(“”);
const handleSubmit = (e) => {
e.preventDefault();
alert(value);
};
return (
<form onSubmit={handleSubmit}>
<input value={value} onChange={e => setValue(e.target.value)} />
<button type=”submit”>Submit</button>
</form>
);
}
React Fragment
Used when you need to group elements without adding extra nodes to the DOM.
<>
<h1>Title</h1>
<p>Description</p>
</>
Default Props and PropTypes
Greeting.defaultProps = {
name: ‘Guest’
};
Greeting.propTypes = {
name: PropTypes.string
};
Importing & Exporting Components
Edit// Greeting.js
export default function Greeting() {
return <h1>Hello</h1>;
}
// App.js
import Greeting from ‘./Greeting’;
Summary of Common React Components
| Task | Command/Method |
|---|---|
| Create React app | npx create-react-app app-name |
| Run App | npm start |
| Build App | npm run build |
| Intall React Router | npm install react-router-dom |
| Intall Redux toolkit | npm install @reduxjs/toolkit react-redux |
| Add CSS | import './App.css' |
Basic Setup of React JS Cheat Sheet with Explanation
Setting up a React application is the first step to building powerful, scalable, and interactive web interfaces. React offers a straightforward development experience, especially with the help of the Create React App (CRA) tool, which sets up everything you need out of the box.
Step 1: Install Node.js and npm
React relies on Node.js and npm (Node Package Manager) for dependency management. Before starting, ensure Node.js is installed on your system.
To check:
node -v
npm -v
If not installed, download and install from: https://nodejs.org
Step 2: Create a New React Application
React recommends starting a new project with Create React App, a tool that sets up a modern web development environment with zero configuration.
npx create-react-app my-app
cd my-app
npm start
- npx runs packages without installing them globally.
- create-react-app initializes a new React project.
- my-app is your project folder.
- npm start runs your application on http://localhost:3000.
Project Structure Explained
After creating the app, your project folder will look like this:
pgsqlCopyEditmy-app/
├── node_modules/
├── public/
│ └── index.html
├── src/
│ ├── App.js
│ ├── index.js
│ └── App.css
├── package.json
└── README.md
Key files/folders:
- public/index.html: Single HTML file where your app is injected.
- src/index.js: Entry point of your React app.
- src/App.js: Main component that displays the UI.
- package.json: Holds project metadata and dependencies.
Modifying App.js
Edit App.js to customize the main component:
import React from ‘react’;
function App() {
return (
<div className=”App”>
<h1>Welcome to My React App!</h1>
</div>
);
}
export default App;
Adding Styles
You can add styling using plain CSS, Sass, CSS Modules, or styled-components.
For example, in App.css:
cssCopyEdit.App {
text-align: center;
color: #333;
font-family: Arial, sans-serif;
}
Installing Dependencies
As your app grows, you might need additional libraries. Here’s how to install common ones:
- React Router:
bashCopyEditnpm install react-router-dom
If everything is set up correctly, your React app will start running with TypeScript support!
- Axios (for HTTP requests) :
bashCopyEditnpm install axios
- Bootstrap (for UI styling) :
bashCopyEditnpm install bootstrap
Common Commands Cheat Sheet
| Command | Description |
|---|---|
| npm start | Starts the development server |
| npm run build | build the app for production |
| npm test | run tests |
| npm install package | installs a package |
| npm uninstall package | removes a package |
Tips for Begginers
- Use Code Editors like VS Code – It has great React extensions like React snippets and ESLint.
- Break UI into components – Don’t keep everything in App.js.
- Use Git for version control – Start tracking your code early.
- Practice using hooks like useState and useEffect – These are essential for managing logic in components.
What is Node.js?
Node.js is a powerful, open-source, server-side runtime environment built on Chrome’s V8 JavaScript engine.
It enables developers to execute JavaScript code outside the browser, typically on the server, making it possible to use JavaScript for full-stack development.
Introduced by Ryan Dahl in 2009, Node.js has revolutionized the web development landscape by making JavaScript a universal language across both the client and server sides.
Today, it’s widely used for building fast, scalable, and efficient network applications — from simple REST APIs to real-time services like chat applications, IoT dashboards, and even microservices architectures.
Key Features of Node JS
If you haven’t set up TypeScript in your React app yet, create a new project using:
1. Asynchronous and Event-Driven
Node.js uses a non-blocking I/O model, which means it can handle multiple operations at the same time without waiting for one to complete before starting the next.
This architecture ensures optimal performance and responsiveness.
fs.readFile(‘file.txt’, (err, data) => {
if (err) throw err;
console.log(data.toString());
});
While reading a file, Node.js doesn’t pause the entire program — it moves on and handles the result later via callbacks or promises.
2. Basic TypeScript Component Example
With Node.js, developers can write both frontend and backend code using JavaScript, which leads to better code reusability, maintainability, and developer productivity.
3. High Performance
Built on Chrome’s ultra-fast V8 engine, Node.js converts JavaScript to machine code for speedy execution.
4. NPM Ecosystem
Node.js comes with npm (Node Package Manager) — the largest ecosystem of open-source libraries in the world. You can install tools, frameworks, utilities, and more with just one command:
npm install express
5. Cross-Platform Compatibility
Node.js runs on Windows, Linux, macOS, and other platforms, making it highly versatile for developers and companies alike.
Where is Node JS Used ?
Node.js is perfect for building:
- REST APIs
- Real-time applications (e.g., chat apps, live dashboards)
- Single Page Applications (SPAs)
- Streaming services
- Command-line tools
- Microservices-based architectures
It’s trusted by tech giants like Netflix, PayPal, LinkedIn, Uber, and many more for handling high-traffic, scalable applications.
How Node.js Works – Behind the Scenes
Node.js runs on a single-threaded event loop architecture. While traditional server platforms like Apache spawn multiple threads to handle concurrent requests, Node.js handles all of them on one thread using non-blocking I/O operations.
- Requests are placed in an event queue.
- The event loop processes them one by one.
- If a request involves I/O (like reading a file or accessing a database), the node passes it to background workers.
- Once completed, the callback is added to the queue to be executed.
This results in fast and memory-efficient execution, especially for I/O-heavy applications.
Benefits of Using Node JS
| Benefits | Description |
|---|---|
| Fast Execution | Thanks to the V8 engine and asynchronous I/O |
| Unified codebase | JavaScript for frontend and backend |
| Scalability | Excellent for apps that require frequent data updates |
| Large ecosystem | Over 1.5M npm packages ready to use |
| Active community | Tons of tutorials, tools, and support are available |
Node.js vs Traditional Servers
| Feature | Node. Js | Traditional Servers (PHP, Java) |
|---|---|---|
| Concurrency | Non-blocking I/O | Thread based Blocking I/O |
| Language | JavaScript | PHP, Java, Python Etc., |
| Performance | Very Fast | Moderate to Fast |
| Scalability | Excellent | Moderate |
Node. Js Cheat Sheet

This Node.js cheat sheet provides a quick reference for developers to remember commonly used commands, syntax, and functionalities.
Whether you’re just starting with Node.js or you’re a seasoned developer working on full-stack applications, having a handy guide can save you time and boost productivity.
This cheat sheet is designed to offer essential concepts, practical code snippets, and commonly used methods that help in setting up, running, and maintaining Node.js applications.
Basic Setup and Initialization
Before starting any Node.js project, you need to initialize your project and set up a package configuration.
mkdir my-node-app
cd my-node-app
npm init -y # Initializes a new Node.js project with default settings
To install packages:
npm install express # Install Express.js (a popular web framework)
Creating a simple server
This is how you can create a basic HTTP server using Node.js:
const http = require(‘http’);
const server = http.createServer((req, res) => {
res.write(‘Hello, World!’);
res.end();
});
server.listen(3000, () => {
console.log(‘Server running on port 3000’);
});
This sets up a server that listens on port 3000 and responds with “Hello, World!” to every request.
Using Express.js for Routing
Express.js simplifies routing and handling HTTP requests.
const express = require(‘express’);
const app = express();
app.get(‘/’, (req, res) => {
res.send(‘Welcome to Express’);
});
app.listen(3000, () => {
console.log(‘Server started on port 3000’);
});
Handling JSON Data
To send and recieve JSON Data :
app.use(express.json());
app.post(‘/data’, (req, res) => {
console.log(req.body);
res.send(‘Data received’);
});
File system Operations
Node.js comes with a built-in fs module for interacting with the file system.
const fs = require(‘fs’);
fs.readFile(‘example.txt’, ‘utf8’, (err, data) => {
if (err) throw err;
console.log(data);
});
write to a file :
fs.writeFile(‘output.txt’, ‘Hello, Node.js!’, (err) => {
if (err) throw err;
console.log(‘File written successfully’);
});
Path Module
To handle and transform file paths :
const path = require(‘path’);
const filePath = path.join(__dirname, ‘files’, ‘data.txt’);
console.log(filePath);
working with module
Creating a module :
// file: greet.js
module.exports = function(name) {
return `Hello, ${name}`;
};
Importing and using the module:
const greet = require(‘./greet’);
console.log(greet(‘Developer’));
Environment Variables
To set and access environment variables:
- Create a .env file:
Port = 4000
2. Use the dotenv package:
npm install dotnev
3. Load the environment variable in your app:
require(‘dotenv’).config();
const port = process.env.PORT;
Useful npm commands
Command | Description |
npm install | Installs all dependencies listed in package.json |
npm install <package> | Installs a specific package |
npm uninstall <package> | Removes a package |
npm update | Updates all packages |
npm list | Lists installed packages |
npm start | Starts the application (based on scripts in package.json) |
Nodemon for Auto-Reload
Nodemon automatically restarts the server when file changes are made.
npm install -g nodemon
nodemon app.js
Error Handling
Basic error handling with try/catch:
try {
// risky code
} catch (err) {
console.error(‘Error:’, err.message);
}
With asynchronous code:
fs.readFile(‘file.txt’, (err, data) => {
if (err) return console.error(err);
console.log(data.toString());
});
Top Node JS Sheet Cheat
Having a reliable cheat sheet can significantly enhance your productivity when working with Node.js. Whether you’re debugging, building REST APIs, interacting with databases, or just exploring the Node.js ecosystem, cheat sheets provide a quick and easy reference to avoid flipping through extensive documentation.
1. Node.js API Cheat Sheet
This cheat sheet provides a comprehensive overview of the core Node.js API. It typically includes:
- File system operations (fs)
- HTTP server creation (http)
- Buffer and stream handling
- Child processes
- Events and the event emitter
- Path operations (path module)
This is ideal for developers who work frequently with low-level Node.js features or want to avoid searching the documentation for every API call.
Best For: Backend developers, system programmers, and performance-focused developers.
2. Node.js + Express Cheat Sheet
Express.js is one of the most used frameworks with Node.js, and this cheat sheet covers:
- Middleware usage
- Routing methods (app.get, app.post, etc.)
- Request and response objects
- Sending files and JSON
- Handling form data
- Using static files
- Error handling middleware
- Route parameters
This is essential if you’re building web apps or REST APIs.
Best For: Full-stack developers, web developers, API developers.
3. Node.js File System (fs) Cheat Sheet
The fs module is core to many Node.js apps. Cheat sheets for this module typically include:
- Reading and writing files (sync and async)
- File watching
- Creating directories
- Working with file streams
- Handling errors
It’s a must-have when dealing with file-heavy applications or automating server-side tasks.
Best For: Developers working on CLI tools, automation scripts, or file-processing apps.
4. Node.js Command Line Cheat Sheet
This cheat sheet focuses on commands and CLI tools for Node.js development, including:
- node CLI options (e.g., node –inspect, node -r dotenv/config)
- Using npx for running tools
- Installing packages with npm or yarn
- Running scripts
- Debugging tools
- Environmental variable setup
Great for quickly referencing how to run your Node.js scripts with specific configurations.
Best For: DevOps, developers working with build scripts or custom tools.
5. NPM & Package.json Cheat Sheet
Covers:
- package.json structure and fields
- Script management
- Dependency types: dependencies, devDependencies, peerDependencies
- Versioning using semantic versioning
- Publishing packages
This is a perfect resource for package authors or developers managing large projects with complex dependencies.
Best For: Open-source developers, library authors, app maintainers.
6. Node.js Debugging Cheat Sheet
Helps you debug your Node.js application efficiently using:
- console.log, console.error
- Using node inspect
- Breakpoints and debugging with Chrome DevTools
- Debugging in VS Code
- Handling uncaught exceptions
Debugging is a crucial part of development, and having a focused cheat sheet can make the process smoother.
Best For: Developers fixing bugs, handling crashes, or optimizing code.
7. Node.js + MongoDB Cheat Sheet
For those using MongoDB with Node.js, this cheat sheet typically includes:
- Connecting to MongoDB with Mongoose
- Defining schemas and models
- CRUD operations
- Query filters
- Aggregation basics
Useful for building full-stack applications with Node.js as backend and MongoDB as database.
Best For: MERN stack developers, backend engineers.
8. Security & Best Practices Cheat Sheet
Covers:
- Input validation and sanitization
- Using HTTPS and secure headers
- Managing sessions and authentication
- Avoiding SQL injections or NoSQL injection
- Rate limiting and throttling
- Helmet.js for setting HTTP headers
A must-have for developers building secure production-level Node.js applications.
Best For: Developers focused on security, compliance, and scalability.
Where to Find These Cheat Sheets?
Many of these cheat sheets are available online on popular platforms like:
- GitHub Gists
- OverAPI
- DevHints.io
- Node.js official documentation
- Hackr.io
- Cheatography.com
You can also find PDF versions to download and keep locally or even printed formats to pin at your workstation.
or want to continue reading about React JS Cheat Sheet
Angular Cheat Sheet

Angular is a popular front-end web application framework developed and maintained by Google. Known for its powerful tools, built-in features, and scalability, Angular is widely used to build single-page applications (SPAs) and dynamic web interfaces.
However, due to its vast syntax and multiple modules, a cheat sheet becomes an essential tool for Angular developers.
This Angular cheat sheet serves as a quick reference guide, helping developers recall important commands, decorators, directives, lifecycle hooks, and more.
Basic Setup of Angular
To create a new Angular project, you need the Angular CLI installed globally:
npm install -g @angular/cli
ng new my-angular-app
cd my-angular-app
ng serve –open
- ng new – creates a new Angular project.
- ng serve – runs the project in development mode.
- –open – opens the project in your default browser.
Key Angular concepts and Syntax
Here are some essential building blocks in Angular you’ll use frequently:
1. Components
Components are the core part of any Angular application.
import { Component } from ‘@angular/core’;
@Component({
selector: ‘app-root’,
templateUrl: ‘./app.component.html’,
styleUrls: [‘./app.component.css’]
})
export class AppComponent {
title = ‘My Angular App’;
}
2. Modules
Modules group components, services, and other modules.
import { NgModule } from ‘@angular/core’;
import { BrowserModule } from ‘@angular/platform-browser’;
import { AppComponent } from ‘./app.component’;
@NgModule({
declarations: [AppComponent],
imports: [BrowserModule],
bootstrap: [AppComponent]
})
export class AppModule {}
Angular CLI Commands
Command | Description |
ng generate component component-name | Create a new component |
ng generate service service-name | Create a service |
ng build | Builds the project |
ng test | Runs unit tests |
ng lint | Lints the project |
ng add <package> | Adds a new dependency |
Common directives
Directive | Purpose |
*ngIf | Conditionally include a template |
*ngFor | Loop over items in a list |
[ngClass] | Conditionally add/remove CSS classes |
[ngStyle] | Dynamically set styles |
Example:
htmlCopyEdit<p *ngIf=”isVisible”>This is conditionally rendered</p>
<ul>
<li *ngFor=”let item of items”>{{ item }}</li>
</ul>
Data Binding Types
Angular supports four main types of data binding:
- Interpolation (One-way binding):
{{ title }} - Property Binding:
<img [src]=”imageUrl”> - Event Binding:
<button (click)=”onClick()”>Click</button> - Two-way Binding:
<input [(ngModel)]=”username”>
Angular Services and Dependency Injection
To share logic across components, use services:
ng generate service data
typescriptCopyEdit@Injectable({
providedIn: ‘root’
})
export class DataService {
getData() {
return [‘Angular’, ‘React’, ‘Vue’];
}
}
Injecting the component in a service.
constructor(private dataService: DataService) {}
Lifecycle Hooks
Angular components have a series of lifecycle methods you can use:
Hook | Description |
ngOnInit() | Called once after component initialization |
ngOnChanges() | Called when input-bound properties change |
ngOnDestroy() | Called just before Angular destroys the component |
Example:
ngOnInit() {
console.log(‘Component initialized’);
}
Routing in Angular
To set up routing:
- Add RouterModule to app.module.ts
- Define routes in a routing module.
typescriptCopyEditconst routes: Routes = [
{ path: ”, component: HomeComponent },
{ path: ‘about’, component: AboutComponent }
];
@NgModule({
imports: [RouterModule.forRoot(routes)],
exports: [RouterModule]
})
export class AppRoutingModule {}
Use router-outlet and routerLink in templates:
htmlCopyEdit<a routerLink=”/about”>About</a>
<router-outlet></router-outlet>
Form Handling
Angular offers two types of forms:
- Template-driven Forms (easy to use, good for small forms)
- Reactive Forms (more control and validation)
typescriptCopyEditthis.form = new FormGroup({
name: new FormControl(”, Validators.required)
});
Top Angular Cheet Sheets
When working with Angular, you may need quick references to improve efficiency in your development process. Fortunately, there are several detailed cheat sheets that you can use to learn Angular concepts, commands, and syntax faster. These cheat sheets usually provide concise, at-a-glance information for Angular’s key features, such as directives, services, components, and more.
1. Angular 2+ Cheat Sheet
This cheat sheet is highly recommended for developers of Angular 2 and beyond. It covers topics like:
- Modules – Learn how to organize your Angular applications into modules.
- Components – Key facts and syntax about components, including lifecycle hooks.
- Directives – Covers built-in directives such as *ngIf, *ngFor, and ngModel.
- Services and Dependency Injection – Basics of how to use Angular’s dependency injection system.
- Routing – Quick reference for the Angular Router to help set up routing in Angular apps.
Best For: Newcomers to Angular who need a solid reference for understanding the core concepts of Angular 2+.
2. Angular Material Cheat Sheet
Angular Material is a UI component library for Angular. This cheat sheet focuses on:
- Importing Angular Material Modules – How to add components such as buttons, forms, dialogs, etc.
- Responsive Layouts – Quick guidelines for creating responsive and accessible UI components.
- Theming – How to configure and customize Angular Material themes.
- Material Icons – How to use Material icons in your app’s UI.
Best For: Developers looking to integrate Material Design into their Angular projects with ease.
3. Angular RxJS Cheat Sheet
RxJS is a powerful library for reactive programming used heavily in Angular. This cheat sheet offers:
- Basic Observables – How to create and manage observables.
- Operators – A list of commonly used operators like map, mergeMap, switchMap, and debounceTime.
- Subscriptions – How to subscribe to observables and handle asynchronous data streams.
Best For: Developers building highly reactive apps that require powerful handling of async data and events.
4. Angular CLI Cheat Sheet
The Angular CLI is essential for quickly generating Angular components, services, and modules. This cheat sheet typically includes:
- Common Commands – Quick commands like ng generate component, ng serve, and ng test.
- Project Configuration – How to configure your app with different environment setups.
- Testing – Testing components and services in Angular with the CLI.
Best For: Angular developers who want to optimize their productivity with the Angular CLI.
5. Angular Testing Cheat Sheet
Angular offers robust testing capabilities for unit and integration testing. This cheat sheet covers:
- TestBed – Set up the testing environment with TestBed.
- Component Testing – Testing components, templates, and their lifecycle.
- Mocking Services – How to mock services and dependencies in tests.
- HTTP Testing – Testing HTTP requests with Angular’s HttpTestingController.
Best For: Developers focusing on writing tests for Angular apps to ensure quality and stability.
Where to Find These Cheat Sheets?
The best sources for Angular cheat sheets include:
- GitHub repositories dedicated to Angular tips and cheats.
- DevHints.io, which hosts cheat sheets for a variety of frameworks.
- Angular’s official documentation, which often contains cheat sheet-like summaries.
- Hackr.io, which compiles useful resources for Angular learners.
These cheat sheets are widely available and can easily be printed for quick access during development.
Difference Between React JS vs Node JS vs Angular JS Cheat Sheet
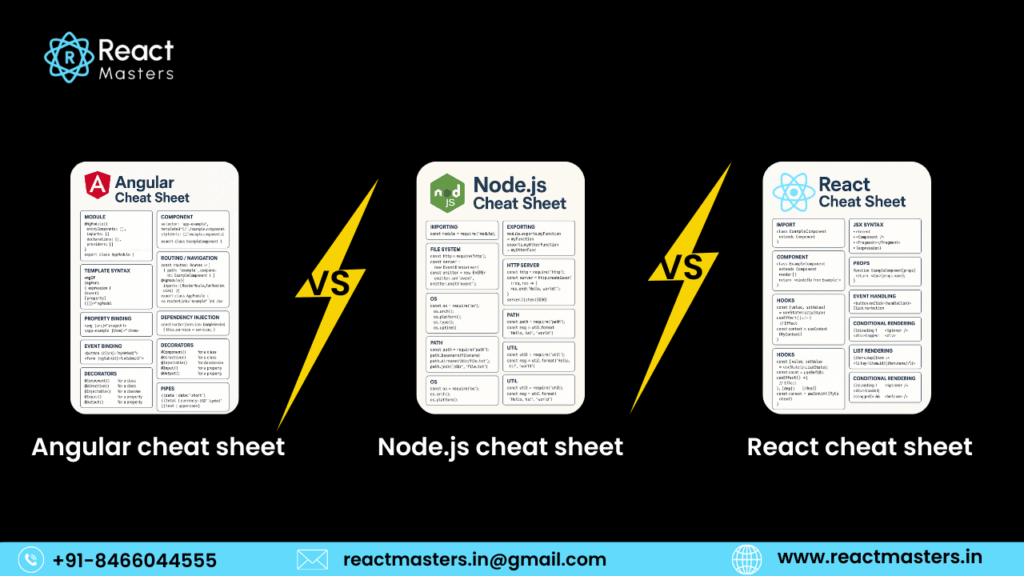
Choosing between React, Node.js, and Angular can be challenging, especially for developers new to web development. Each of these technologies offers unique features, so it’s important to understand their differences before making a decision.
1. React JS
- Type: JavaScript library (focused on the view layer).
- Use Case: Best for building user interfaces, especially single-page applications.
- Key Features:
- Component-based architecture.
- Virtual DOM for improved performance.
- One-way data binding.
- Rich ecosystem with Redux for state management.
- Can be used with other libraries or frameworks.
Best For: Developers building dynamic user interfaces and SPAs.
2. Node JS
- Type: Server-side JavaScript runtime environment.
- Use Case: Ideal for building fast, scalable network applications, and server-side APIs.
- Key Features:
- Uses an event-driven, non-blocking I/O model.
- Lightweight and efficient for real-time applications.
- Built on Google Chrome’s V8 JavaScript engine.
- Great for building RESTful APIs, real-time chat applications, and microservices.
Best For: Backend developers looking to create server-side applications and services.
3. Angular JS
- Type: Full-fledged framework (front-end).
- Use Case: Best for building single-page applications with an integrated approach.
- Key Features:
- Two-way data binding.
- Dependency injection system.
- Directives for extending HTML functionality.
- Complete framework with routing, forms, and HTTP client out of the box.
- High learning curve but very powerful for large applications.
Best For: Developers building large-scale applications where full control over the app structure is needed.
Summary :
Feature | React JS | Node JS | Angular JS |
Type | Library (Frontend) | Runtime (Backend) | Framework (Frontend) |
Use Case | UI Development | Server-side apps | Full-Stack SPAs |
Data Binding | One-way (by default) | N/A | Two-way |
Learning Curve | Moderate | Easy to Moderate | Steep |
Performance | High (Virtual DOM) | High (Non-blocking) | Moderate to High |
Java Script Cheat Sheet
JavaScript is the core language that powers web development. Having a cheat sheet for JavaScript helps you quickly recall syntax, functions, and common patterns.
Here’s an overview of important sections often included in a JavaScript cheat sheet:
- Variables – let, const, var.
- Data Types – Strings, numbers, arrays, objects, booleans, etc.
- Functions – Function declarations, arrow functions, anonymous functions.
- Loops – for, while, do while, forEach.
- Object Methods – Object.keys(), Object.values().
- Array Methods – .map(), .filter(), .reduce(), .forEach().
- ES6+ Features – Promises, async/await, destructuring, spread/rest operators.
JavaScript cheat sheets are often compact but cover the most important features and syntax you’ll need for writing clean, effective code.
Components in React
Components are the building blocks of React. React’s component model allows you to create reusable, encapsulated pieces of code that represent parts of your user interface. Components can be:
- Class Components – Older syntax, uses render() method to output JSX.
- Functional Components – Simpler syntax, can utilize React Hooks for state and lifecycle management.
- State and Props – Manage data flow within and between components.
- Lifecycle Methods – Functions that let you hook into specific points of a component’s lifecycle.
Components can be nested, managed, and composed to build complex UIs from small, isolated pieces of logic.
Conclusion:
In conclusion, cheat sheets serve as invaluable tools for developers, offering quick, concise references to streamline the coding process.
Whether you’re working with React, Node.js, Angular, or JavaScript, these cheat sheets help reduce the time spent searching for syntax, functions, or concepts.
They allow developers to focus more on building robust applications and less on remembering intricate details.
By having essential information at your fingertips, you can work more efficiently and effectively, especially when navigating through complex frameworks and libraries.
Ultimately, mastering these technologies with the right cheat sheets can significantly enhance your productivity and coding experience.
As web development continues to evolve, keeping these resources handy will ensure that you’re always prepared to tackle challenges and build powerful, modern applications.
FAQ's (Frequently asked Questions)
React JS Cheat Sheet
React JS is a JavaScript library developed by Facebook for building user interfaces, especially single-page applications (SPAs). It allows developers to create reusable components and manage the UI efficiently using a virtual DOM, leading to faster rendering. React’s flexibility, extensive ecosystem, and strong community support make it a popular choice for building dynamic, interactive web applications.
Node.js is a server-side JavaScript runtime built on the V8 engine. It is used to build scalable, fast, and efficient network applications, particularly for real-time applications like chat apps, APIs, and web servers. Node.js uses an event-driven, non-blocking I/O model, which makes it ideal for handling multiple requests simultaneously without delays.
Angular is a full-fledged framework, while React is a library. Angular provides a complete solution for building applications, including routing, form handling, and dependency injection. React, on the other hand, focuses only on the view layer, giving developers flexibility to integrate other libraries for things like state management or routing. React is often considered easier for smaller projects, whereas Angular is suited for large-scale enterprise applications.
Yes, React and Node.js can be used together. React is typically used for building the frontend of web applications, while Node.js is used for server-side operations, such as handling APIs and managing databases. Combining both enables you to build full-stack JavaScript applications, where both the frontend and backend are powered by JavaScript.
The virtual DOM (VDOM) in React is a lightweight copy of the actual DOM. React uses it to optimize performance by making updates in the virtual DOM first and then selectively updating the actual DOM. This approach reduces the number of DOM manipulations, leading to faster rendering and a smoother user experience.
Angular supports two-way data binding, which means that changes in the UI automatically update the model and vice versa. React, on the other hand, uses one-way data binding, where the state flows in one direction, typically from parent to child components. React’s unidirectional data flow gives developers more control over the data, while Angular’s two-way data binding is convenient for simpler forms and UI interactions.
Express.js is a minimal and flexible web application framework built on top of Node.js. It simplifies the process of building web servers and APIs in Node.js by providing a robust set of features for routing, middleware, handling requests, and managing HTTP responses. Express is widely used in combination with Node.js to develop RESTful APIs and server-side applications.
React Hooks are functions that allow you to use state and other React features in functional components. Before hooks, state management and lifecycle methods were only available in class components. With hooks like useState, useEffect, and useContext, you can manage state, side effects, and context in a more concise and readable way within functional components.
JavaScript is a programming language that is primarily used for client-side scripting in web browsers. Node.js, on the other hand, is a runtime environment that allows you to run JavaScript code on the server side. While JavaScript is traditionally used in the browser, Node.js enables you to use JavaScript for building server-side applications and handling backend operations.
Angular provides several advantages for building web applications, including:
- Two-way data binding simplifies synchronization between the model and the view.
- Dependency injection makes it easier to manage services and code reuse.
- Comprehensive tooling, such as the Angular CLI for generating components, services, and more.
- Modular architecture which promotes cleaner, maintainable code.
- Built-in testing capabilities, which help ensure quality through unit and integration tests.
Hope you found good understanding about React JS Cheat Sheet, with detailed explanations. Hope this helps you.